The Plot Thickens: Editing Allotment Harvest Photos Without the Showbench Shine
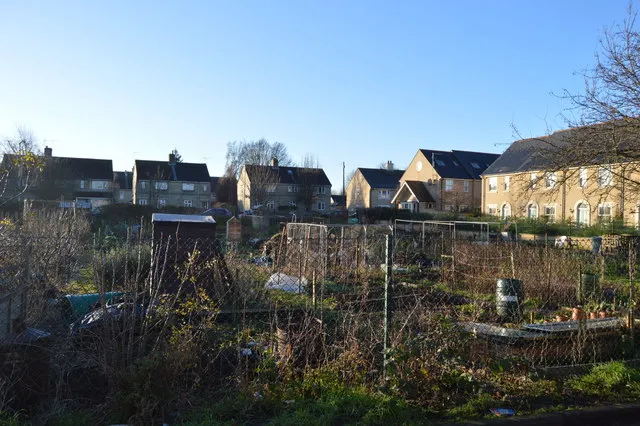
Photo: N Chadwick , CC BY-SA 2.0, via Wikimedia Commons
There's a particular look to a harvest photo taken on a British allotment in late summer. The sky is a flat grey duvet, the light has all the drama of a wet Wednesday, and somewhere in the background there's a blue water butt, half a pallet and a neighbour's shed in a shade of green that no paint chart would claim. It's honest, it's messy, and it's exactly what makes the picture worth taking.
The temptation, once you open it in Photoshop, is to fix all of that. Push the greens until the courgettes glow like a supermarket advert, lift the shadows until the soil looks like cocoa powder, and clone out every stray weed until the plot resembles a showbench display. Please don't. The aim here is a harvest photo that still smells faintly of compost.
Below is a workflow I use for plot shots — one that keeps the colour truthful, gives soil and timber a bit of grip, and tidies the frame without sanding off the personality.
Start with a flat, honest negative
If you shoot raw, begin in Camera Raw with the Adobe Neutral profile rather than the punchier Standard or Landscape options. Neutral gives you a duller starting point, which sounds like a downside until you realise it stops the greens running away from you before you've made a single decision.
Set white balance from something genuinely neutral in the frame — a grey card is ideal, but a white plant label or the inside of a seed tray will do in a pinch. Overcast light in the UK leans cool, so you'll often be nudging temperature up by a few hundred Kelvin. Resist the urge to go warm enough to suggest Tuscany. The light was grey; let it be grey.
Apply lens corrections, then pull Highlights down and open Shadows modestly — no more than about +25. You want the detail back in the dark underside of a marrow, not a HDR halo around the bean canes.
Greens that behave themselves
The biggest giveaway of an over-edited harvest shot is fluorescent foliage. Rhubarb leaves, brassica stalks and runner bean pods all contain subtly different greens, and a single global saturation slider flattens them into one shouty chorus.
Work in the Colour Mixer (or Hue/Saturation with a targeted range) and treat each hue separately. Nudge Yellow-Green hue slightly toward green, lift its saturation by a handful of points only, and leave Green alone. If your courgettes look radioactive, it's usually the Yellow slider that's too high, not the Green one.
For anything stubborn — a lettuce that insists on looking minty when it was clearly olive — add a Hue/Saturation adjustment layer, target the specific range with the eyedropper, and paint the mask in at about 60% opacity. That way the correction sits only where it's needed. A little variation across the frame is a feature, not a fault.
One reliable trick: temporarily boost saturation to +60, make your selections and masks, then drop it back to a sane +5. You'll spot the problem areas instantly and you won't be tempted to leave the whole image loud.
Give soil and timber some grip
Soil is the hardest thing to photograph well and the easiest thing to ruin. Too soft and it looks like coffee grounds; too sharp and every clod becomes a crunchy digital artefact.
Use Photoshop's Texture slider in Camera Raw for the bulk of the work — somewhere between +15 and +25 on a typical plot shot — and keep Clarity lower, around +8. Texture targets medium-frequency detail, which is exactly what damp earth, weathered timber and the grain of a wooden crate respond to. Clarity is broader and will start haloing around stems if you push it.
For the really important areas — the ridge of a freshly earthed potato row, the side of a raised bed — add a Curves layer set to Luminosity and apply a gentle S-curve through a mask. Dodge and burn with a soft brush at 10% opacity to bring shape back into the clods. It's slow, but it looks like soil rather than a filter.
When sharpening on export, use a high-pass layer at a low opacity and mask it to the earthy, textured parts of the frame. Leave the sky and any soft background foliage alone.
Clean the clutter, keep the character
Here's where judgement matters. The line between a tidy composition and a sterile one is thin, and it moves depending on what the photo is for.
If it's a record shot for your own diary or the allotment society newsletter, leave the plot number, the string line, the wonky bamboo cane and the mug on the bench. Those are the story. If it's going on a seed packet or a blog header, then yes, remove the bin bag.
Use the Healing Brush for small distractions — a stray crisp packet, a bright slug, a hose connector — and Clone Stamp for anything with structure that healing would smear. Content-Aware Fill is fine for background foliage but tends to invent shapes that look plausible until you zoom in, so check at 100% before you commit.
A useful rule: remove anything that competes for attention, keep anything that explains the place. A muddy boot at the edge of the frame explains the place. A traffic cone doesn't.
A season-long batch routine
Allotment photography tends to arrive in bursts — a glut of beans one week, nothing but rain the next. A simple batch routine saves you from editing fifty near-identical shots one at a time.
- Import into Bridge or Lightroom Classic, apply the Neutral profile, lens corrections and a basic exposure adjustment to your best frame.
- Sync those settings across the rest of that day's shots, then open the keepers in Camera Raw as Smart Objects.
- Save a preset for the greens and another for the soil texture, applied as adjustment layers rather than destructive edits.
- Export two versions: a full-size TIFF for print and a 2000px sRGB JPEG for the web. Name them by date and crop —
2026-08-14-runner-beans-01. - Build a contact sheet at the end of the season. It's the fastest way to spot the shots that actually say something about the plot.
The final check
Before you export, step back from the screen and ask one question: does this look like the plot, or like a picture of a plot? If the greens could exist in a British summer, if the soil still looks like it would stain your knees, and if there's one small untidy detail left in the corner, you've probably got it right.
The marrow doesn't need to shine. It just needs to look like it grew.