Four Hundred Muddy Finishers, One Evening: A Volunteer's Photoshop Batch Workflow
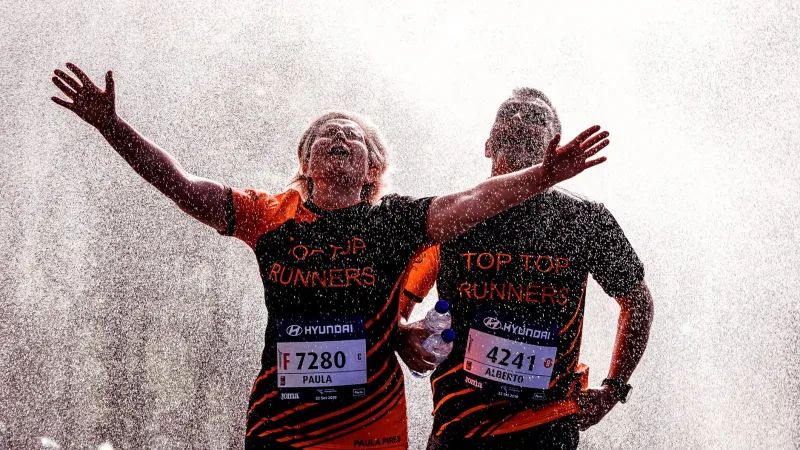
You've been stood in a muddy field since half eight, your fingers have stopped cooperating, and you've come home with 412 frames of people who look like they've been dragged through a hedge backwards. Because they have been. That's rather the point.
Club race and parkrun galleries aren't portrait sessions. Nobody wants airbrushed skin or a swapped-in Californian sky. They want to find themselves in the album, recognise the effort on their own face, and read their bib number without zooming to 400 per cent. Everything below serves those three goals — and gets you to bed before midnight.
Cull first, and cull hard
Editing is the slow part, so never edit a photo you aren't going to publish. Import into Bridge and work the keyboard: P to keep, X to reject, arrow keys to move. Two passes.
Pass one is housekeeping — eyes shut, backs of heads, half a marshal's arm across the frame, anything soft enough to look like a smear.
Pass two is the one people skip. Hunt for the story frames: the sprint finish, the first-timer crossing the line, the bloke in the dinosaur costume, the junior race with socks round the ankles. You want maybe 60 to 90 keepers out of 400. Be ruthless. The club would rather have 70 good photos than 300 indifferent ones.
Then split your keepers into lighting batches before you touch a single slider: bright sun, flat overcast, and anything shot under trees. Those three need different treatment, and mixing them in one batch is how half a gallery ends up looking radioactive.
Rename before you edit, not after
Do this while the kettle boils. In Bridge, Tools > Batch Rename, and build something like 2026-11-hillside-10k_0001. Event code, date, sequence. No spaces, no 'final_final_v2', and nothing that depends on the camera's own numbering — that resets every 10,000 frames and will bite you eventually.
Why bother? Because files get handed to the club secretary, uploaded to a Facebook group, emailed to a parent, and re-shared six weeks later. A sane filename is the only thing that survives that journey. While you're there, apply a metadata template with your copyright and a keyword for the event name. Takes ninety seconds, saves endless 'who took this?' messages.
One smart object, endless swaps
Here's the trick that turns a four-hour job into a ninety-minute one. Open your first keeper, convert the layer to a smart object, then apply Filter > Camera Raw Filter. That lands as a smart filter — fully editable, non-destructive, and crucially, copyable.
Save that as a template PSD. For the next photo in the batch, select the smart object layer and use Layer > Smart Objects > Replace Contents. The new file drops in and every adjustment you made rides along with it. Nudge exposure, tweak the white balance, and move on.
It works beautifully for a batch of photos taken in identical light — same field, same cloud cover, same ten minutes. It emphatically does not work across a whole card, which is why we split into lighting batches first. Don't try to be clever and drag one set of settings from a sunny finish funnel onto shots taken under oak trees at 9am. You'll spend longer undoing than doing.
Keep the weather, keep the mud
Resist the urge to fix the day you were given. A flat grey November morning is not a problem to be solved; it's the reason the photos feel like that particular race on that particular Saturday.
So: lift the shadows enough to see faces in the trees, but don't drag the whole image up until the sky is white and the grass is shouting. Pull Highlights down rather than pushing Exposure up. Add a whisker of Clarity — somewhere around 5 to 10 — and stop there, because clarity applied to a face at 30 is a fast route to gravel skin. Mud on shins should stay muddy. Wet vests should stay wet.
For skin, ignore it entirely. You're not retouching here. If someone's face is darker than you'd like, use a masked Curves layer over the face only, feathered generously, and lift the midtones a touch. That's the whole skin workflow. Nobody wants a finish-line photo that looks like a cosmetics ad.
Sharpen the runner, not the gravel
High-ISO action shots plus global sharpening equals a crunchy, noisy mess. Instead, do your capture sharpening inside Camera Raw, and use the Masking slider — hold Alt while you drag, and stop when only the edges show white. Somewhere between 40 and 60 is usually right for runners against a busy background.
If you want output sharpening, keep it on its own layer: duplicate, Filter > Other > High Pass at about 1.5 to 2 pixels, blend mode Linear Light, then mask it to the athlete. Gravel paths and tarmac don't need help looking gritty. Faces and vest logos do.
Making bib numbers actually readable
This is the one thing that genuinely matters to runners and is almost always forgotten. Bibs are usually bright with dark text, or dark with bright text, and they're often in shade under a jacket or a hand.
Make a targeted adjustment: a Curves layer masked to the bib, lifting the highlight end rather than the whole curve. Hold Alt as you drag the white point so you can see exactly when the paper clips — stop just before. A tiny bump in local contrast (Curves again, gentle S-curve, same mask) does more for legibility than any clever filter. If a bib is hopelessly lost in shadow, that's a cull, not a rescue job.
Export presets and a clean handover
Two exports, no more. One full-size set for the club archive at sRGB, long edge 2400px, JPEG around 85. One web set at 1600px, quality 78 to 82, metadata stripped except copyright.
Record an action or a droplet for each and run them while you tidy up. Name the folders by event and date, drop a short text file in with the credit line and a note about who to contact for takedowns, and you're done.
One last thing worth saying out loud: photographs of children at these events get shared widely, quickly. Check with the club what their policy is, and if you're unsure about a frame, leave it out. There'll be another Saturday.