Blue Lips, Bright Tow Floats: Editing Open-Water Swimmers Without the Advert Glow
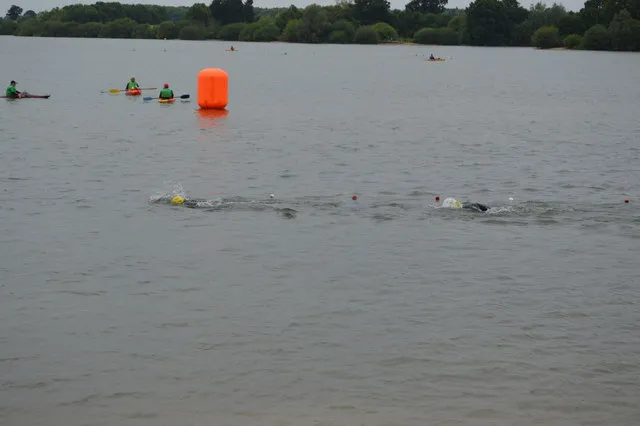
Photo: N Chadwick , CC BY-SA 2.0, via Wikimedia Commons
There is a photograph that turns up on every open-water swimming club's page after the first proper cold snap. Someone mid-breath, water sheeting off a shoulder, a tow float bobbing behind them like an optimistic orange comma, and a sky the colour of a wet dishcloth. It is a brilliant picture. It also gets edited, far too often, into something that looks like a wetsuit advert from a magazine nobody buys any more.
This workflow is about the opposite. It is about keeping the goosebumps, the grey light and the slightly alarming colour of a swimmer's hands after eight minutes in a Yorkshire reservoir. Photoshop is doing its job when nobody notices it has been there.
Read the file before you touch a slider
Open the raw in Camera Raw and look at the histogram before you look at the picture. A flat grey morning usually gives you safe highlights and mushy midtones, which is fine — that is what the morning actually looked like. Switch the profile to Adobe Neutral or a camera-matching profile if you have one, and apply lens corrections. Resist Dehaze. It is the single fastest way to make damp air look like a desert and turn a swimmer's skin into terracotta.
If you shot at ISO 3200 to hold a fast shutter, deal with noise early. A light pass of denoise — 30 to 40 is usually plenty — then add grain back at the end. Denoised water looks like vaseline. Grainy water looks like weather.
White balance when the sky is grey and the water is green
Auto white balance on a dull day drifts blue, and blue is the last thing a cold swimmer needs. Find something neutral in the frame: a white swim cap, a patch of pale tow float, a bit of concrete at the lido edge. Use the white balance picker on that and then nudge Temp back towards warm by a couple of hundred kelvin if the result looks clinical.
Reservoir and lake water often carries a green cast, especially in the Peak District and the Lake District after rain. Do not neutralise it. Windermere is not the Maldives and it should not pretend to be. Instead, take a targeted approach: use Colour Range to select the greens in the water, feather the mask hard, and pull saturation down by maybe ten points while leaving hue alone. The water stays green, just calmer and less radioactive.
Neoprene: texture in, glare out
Wet neoprene is basically a highlight machine. Shoulders, hoods and chest panels routinely blow past 250 and once they are there, no slider is bringing them back. Work on the ones you can save.
Start with Highlights around minus 30 and Whites around minus 10 in Camera Raw. Then, in Photoshop, build a luminosity mask — Colour Range, select 235 to 255, feather it — and put a gentle Curves adjustment through it to pull the brightest specular patches down. Keep it subtle. If the rubber starts looking matte, you have gone too far and it will read as fabric.
What you want to avoid is negative Clarity. It smooths the surface into plastic and is the main reason swim photos end up looking like catalogue shots. If anything, add Texture at plus 10 to plus 15, masked to the suit, so the weave and the water droplets stay legible. Heal dust and sensor spots, not texture.
Skin, flush and the ethics of a warm-looking swimmer
Cold-water swimmers go pink on the shoulders, red on the chest and blue on the lips and fingertips. That is the story. Do not airbrush it out.
Use the HSL panel to take a small amount of saturation out of the reds and oranges — five to ten points, no more — and then stop. Avoid the Warmth slider entirely; it flatters nobody with a flushed face. If a cheek is distracting, use a Selective Colour adjustment with a tiny magenta reduction and a Curves layer on the red channel pulled back a fraction.
Healing brush is for blemishes and nothing else. Leave goosebumps, arm hair, water droplets and the odd bit of weed. A swimmer with perfect skin in six-degree water is not a photograph, it is a lie, and readers can spot it instantly.
Tow floats, neon hats and the clipping problem
Orange tow floats and fluorescent hats are safety equipment and they are meant to shout. They also clip in sRGB the moment you look at them. Use Colour Range to isolate the bright orange or pink, then apply a Vibrance layer with saturation reduced by roughly ten points through that mask, plus a gentle Curves to keep the shape inside the float. It will still read as neon on screen and in print, but it will hold detail rather than flattening into a solid block.
Do not remove the safety kayak. Do not remove the bank marker. They are part of the scene and, frankly, part of the trust.
Water, splash and the drizzle you should keep
Water is the texture engine of the whole picture. Add Texture selectively, maybe plus 15 through a mask that covers only the water and not the sky. A touch of Clarity on splashes is fine, but watch for halos around shoulders and hoods.
Rain spots on the lens, drizzle in the air, a bit of spray hanging in front of the swimmer — leave them. Healing those out removes the very thing that makes the frame feel British. If you want the classic cold-morning look, finish with a light grain in Camera Raw, around three to five, and a very small amount of midtone contrast in Curves.
Sharpening without the crunchy look
For high-ISO action, keep Detail low, around 25, radius at 0.8, and push Masking up to 60 or 70 so you are only sharpening edges. Water and rubber sharpen badly and will show artefacts fast. Zoom to 100 per cent on a shoulder and a splash before you call it done, not on the face alone.
A five-minute batch for club galleries
Swimming clubs rarely need one perfect image; they need forty decent ones by Tuesday. Build the whole thing as a Camera Raw preset — profile, lens correction, modest highlight recovery, your green-water tweak, grain — save it as an XMP and apply it in Bridge. Use Image Processor to spit out 2048-pixel long-edge JPEGs in sRGB at quality 80, sharpened for screen. Then open only the three or four hero shots for the masked work.
The squint test
Stand back from the screen and squint. Does it look like the morning felt? Grey, bright, cold, a bit chaotic, breath hanging in the air? If it looks like a spa brochure, start again. The best open-water photographs are not smooth — they are shivery, and that is exactly the point.