The Attic Archive: Restoring Faded Family Prints in Photoshop (and Knowing When to Stop)

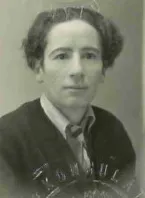
Photo: Edmund Evans / Joseph Martin Kronheim / William Dickes / Adam Cuerden, Public domain, via Wikimedia Commons
There is a particular smell to a box of old family prints. Dust, cardboard, maybe a faint whiff of the chemist envelope they came home in. You find them in a loft in Leeds, a charity shop in Devon or a car boot sale in Norfolk, and suddenly you are holding somebody else's Sunday afternoon from 1978. The temptation is to fire up Photoshop and make it look new. The better approach is to make it look cared for.
Start with a decent scan, not a phone snap
If the print is small, scan it at 600 ppi. For larger prints, 300 ppi is often enough, but there is no harm going higher for a one-off family piece. Use a flatbed scanner with the lid down and a clean glass surface. A phone photo on the kitchen table will do in an emergency, but it adds perspective problems, reflections and uneven light that you then have to fight in Photoshop.
Save the scan as a TIFF master before you touch anything. Treat that file as the negative. Every correction happens on a duplicate layer or an adjustment layer above it, so you can always go back. If the print has a border, include it in the scan. You can crop later, and that border is sometimes useful evidence of the original lab print.
Kill the orange cast without killing the skin tones
Old Boots lab prints are famous for going warm, pink or outright orange. It is not usually one simple colour cast either. The shadows may drift one way and the highlights another. Start with Curves rather than Auto Colour. Auto Colour is quick, but it often turns a 1970s seaside postcard into a freezer cabinet.
Find something in the photo that should be neutral: a white shirt, a grey pavement, a piece of paper. Use a Curves adjustment layer and sample that area with the grey-point eyedropper. Then check the individual red, green and blue channels and nudge them gently. The aim is neutral, not icy. Skin should still have warmth. If Grandpa looks like a Smurf, you have gone too far.
A Hue/Saturation layer can help with faded prints, but use it sparingly. Old prints often lose saturation unevenly, so a global boost can make the grass look radioactive while the faces stay pale. Try a Vibrance adjustment first. If the print has a colour stain down one side, use a mask and correct that area separately.
Creases, scratches and the dreaded water stain
Dust and light scratches are easy. Create a new blank layer, set the Spot Healing Brush to Sample All Layers, and work at 100% zoom. Short dabs are better than long smears. For a hard crease across a wall or a jumper, the Clone Stamp is often more honest than healing, because healing can blur texture into a soft patch.
Water damage is where restoration gets philosophical. A tide mark through a face is not a technical problem; it is a judgement call. You can reduce the stain with a masked Curves adjustment, or desaturate the stained area slightly. But if the damage has eaten the detail, painting over it will only create a smooth lie. Sometimes the right answer is to leave the mark and let the photo keep its history.
Rebuilding torn corners with Content-Aware tools
A missing corner is common on prints that have spent decades in a shoebox. First, extend the canvas so Photoshop has somewhere to work. Select the empty area with the Lasso tool, then use Edit > Content-Aware Fill. For simple backgrounds, such as sky or a plain wall, it can be remarkably good. For a corner that includes a shoulder, a chair leg or a patterned carpet, expect to clean up afterwards with the Clone Stamp.
Content-Aware Fill is a helper, not a magician. Do not ask it to rebuild a face, a hand or lettering. Work in small selections, check the result at 100%, and keep the original scan on a layer below so you can compare. If the repaired corner starts to look like melted plastic, undo and try a smaller area.
The honesty rule: stop before Grandma goes plastic
The best family restorations are the ones where nobody asks what you did. You removed the dust, calmed the colour, repaired the tear and left the person alone. That means no skin smoothing, no teeth whitening, no eye colour changes and no slimming. Wrinkles are not damage. A slightly crooked smile is not damage. The photograph is a record, not a beauty brief.
A useful test is to compare the restored file with the original at the same size. If the face has lost its character, pull back. If the skin has gone waxy, pull back. If the eyes look brighter than they do in every other photo of that person, pull back. Grandparents should still look like themselves, only clearer.
Saving and printing
Keep the layered TIFF as your working master. For sharing, export a high-quality JPEG in sRGB. For printing, find a decent lab or a local print shop that uses archival paper. A soft proof will tell you whether the shadows are going to block up on paper. And if you are restoring someone else's family photos from a car boot sale, be careful about sharing them online. They may be strangers, but they are still somebody's family.
Restoration is not about making the past look perfect. It is about making it visible again, with enough respect to leave the truth in the frame.